Are you sick and weary of the noise that envelopes you, preventing you from working efficiently, unwinding, or maybe even finding peace of mind? Be at ease; we will here demonstrate how to install acoustic panels in simple methods for your convenience.
The age of sound has here! Acoustic panels were introduced as the unsung heroes of noise reduction and sound quality improvement. Installing acoustic foam panels could be the game-changer you’ve been looking for, whether you’re setting up a home theatre, or music studio, or simply trying to recapture your serenity.
Before we dive into the process of installing acoustic panels, it is important to know what acoustic panels are and how they work.
what are acoustic panels?
Acoustic panels are specialized tools used to boost audio quality and regulate noise levels in a variety of settings. They are often constructed of substances with great sound-absorbing qualities, including mineral fiber, foam, or fabric.
The panels are carefully positioned on walls, ceilings, or other surfaces to lessen echo, reflect sound less, and produce an acoustically more balanced atmosphere.
Acoustic panels’ primary purpose is to absorb sound waves that would otherwise bounce off of solid objects and produce unwelcome noise.
Sound waves interact with the panels, passing through the surface and into the interior layers. These layers efficiently dampen the volume and duration of the sound by converting the sound energy into heat energy through friction and other methods.
how do Acoustic panels work?
So how do these mystical panels do their miracles? It all comes down to their secret weapon, which is composed of unique materials with a talent for sound absorption.
These panels give sound waves a bear hug and won’t release go when they hit against their surface. The acoustic wizardry of the panels holds the sound waves captive, preventing them from bouncing around the space like party animals.
It’s like you have a group of noise ninjas discreetly prowling around every corner of your house. They capture those untamed sound waves and convert them into heat energy, which is easier to control.
Talk about dialing down the heat while things are getting hot! These panels are strategically placed to target the problem areas where sound tends to bounce and reverberate, bringing calm and tranquility to your room.
Required Tools And Materials
Tools:
- Measuring Tape
- Pencil or Marker
- Level
- Drill or Screwdriver
- Step Ladder
Materials:
- Acoustic Panels
- Mounting Hardware
- screws
- adhesive strips
- mounting brackets
- Adhesive

Step-By-Step Guide For How To Install Acoustic Panels
1. Preparing the Installation Area
A smooth installation process depends on clearing the area and getting rid of any obstacles. So embrace your inner Marie Kondo and organize your space like a boss.
Get rid of those extraneous objects to make room for your acoustic panel masterpiece. Your panels will appreciate the breathing room, I assure you.
Let’s now measure and mark like seasoned do-it-yourself sleuths. Take out your reliable measuring tape and proceed with caution.
The wall or ceiling where the panels will be displayed should be measured. The key to a perfect fit is in those numbers, so don’t be shy about getting up close and personal with them.
Mark the locations where the panels will be prominently displayed using your pencil or marker after taking measurements.
Keep in mind that this is your chance to shine as a creative visionary. So feel free to graffiti those walls or ceilings in confidence while channeling your inner Pablo Picasso.
Simply double-check your work unless you’re going for an avant-garde asymmetrical appearance.
Also, Read: How To Install Mass Loaded Vinyl?
2. find the wall studs or the ceiling joists
It’s similar to playing hide and seek to locate ceiling joists or wall studs. You don’t have to be Sherlock Holmes to solve this mystery, so don’t worry about that.
Start by looking for that distinct “thud” that denotes the presence of a stud or joist by tapping the wall or ceiling or using a stud finder.
Once you’ve located them, give them a kind pat and introduce yourself; after all, they’ll be supporting your acoustic panels.
Mark their location with a pencil on the wall or ceiling, being careful not to drill or screw into any plumbing or electrical lines. Your ears will appreciate the extra work you took to reduce any unnecessary noise, I promise.
3. Putting the Acoustic Panels in Place
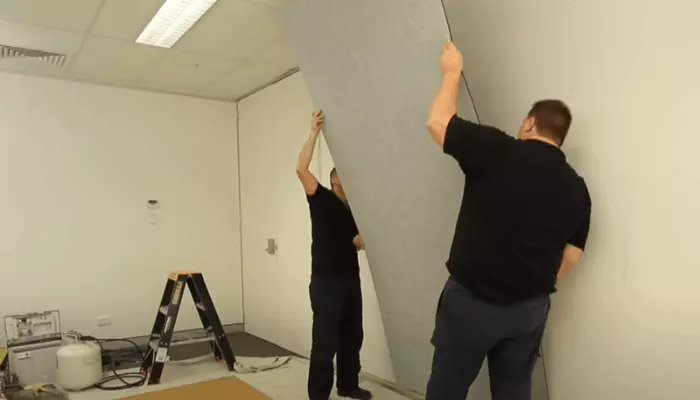
It’s time to let your DIY-loving side out and mount those acoustic panels skillfully! Prepare to change a wall or a ceiling by grabbing your go-to drill or screwdriver.
Keep in mind to consult the manufacturer’s instructions for the precise mounting technique advised for your panels.
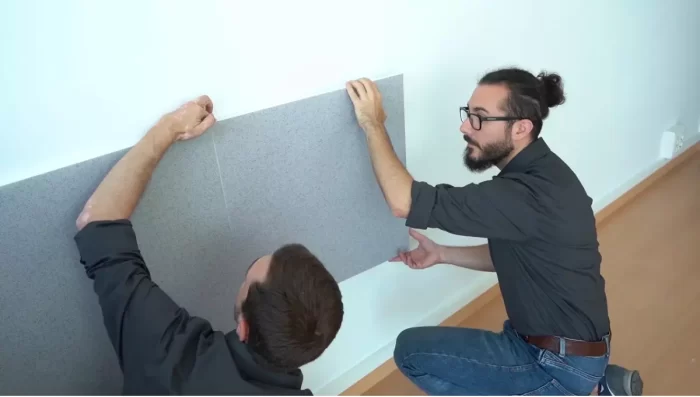
Use the appropriate mounting hardware to fasten the panels in place after aligning them with the marked locations.
Give those screws a good twist, but don’t twist them too tightly—this is not the place to display your Hulk-like power. Back up and take in your own workmanship.
It’s done! You’ve just transformed the acoustic mayhem in your room into an elegant soundscape. It’s time to unwind, sit back, and take in the soothing music of stillness.
4. Finding the Right Panel Alignment
We don’t want a confused chorus line that looks like an out-of-control dance party when it comes to panel alignment.
It’s time to get the level out and get things back in order! Step back and evaluate the circumstance. Are your panels leaning over like disobedient teenagers, or are they standing tall and straight like a disciplined army?
Make necessary alterations to their places to guarantee proper alignment. Keep those panels in perfect harmony to produce a visual symphony that will please even the most critical of critics.
5. Covering Cables and Wiring
Ah, those clever cables and wiring, striving to snag the spotlight at all costs! But don’t worry my friend; we have a strategy to keep them out of sight.
Choose which path your cables will travel, such as a network of covert tunnels, first. To properly hide them so they don’t detract from your beautifully placed acoustic panels, use cable covers or raceways.
Let’s keep those cords hidden and keep things looking tidy and clear. After all, an equally smooth cable management technique is required for a seamless visual experience.
Also, Read: How Can I Soundproof My Windows Cheaply?
6. Finishing Touches
Greetings, my friend! The installation of your acoustic panels is almost complete. It’s time to add the finishing touches that will transform your area from nice to amazing.
Look for any openings or rough edges and fill them in with caulk or putty, just like a master craftsman finishing a piece of art.
Don’t forget to take a step back and enjoy your job, just like a proud father does when their child performs for the first time.
You’ve designed a room with excellent acoustics and eye-catching aesthetics. It’s time to unwind, take a seat, and savor the sweet sound of achievement.
7. Testing and Evaluating the Results
Time to don your lab coat and start conducting some intensive sound testing! Grab your favorite music or a dramatic movie scene, and be ready to be amazed.
Take a seat in your newly restored space and allow the sound to gently flow over you. Take note of the minimized reflections, enhanced clarity, and removal of those annoying background noises.
Now that your acoustic panel installation is complete, you may enjoy the delectable results as the official audio connoisseur. You’ve created a symphony of blissful sounds in your space; give yourself a standing ovation.
Conclusion:
My friend’s music lovers, that’s all there is to it! You’ve arrived at the highest point of your installation trip for acoustic panels.
Congratulations! You’ve managed to control the chaotic sound waves and create an audio haven. Now take a seat, unwind, and enjoy the peaceful, tranquil music.
Your acoustic panels are the unsung heroes that have turned your room into a symphony of sound perfection, whether you’re listening to your favorite music, having a movie night, or just relaxing in the peace and quiet. Bravo!
FAQs About How to Install Acoustic Panels
There are a lot of questions that come to mind while choosing a How to Install Acoustic Panels some of the commonly asked questions are answered below.
q1. Do acoustic panels completely eliminate all noise?
Ans. Acoustic panels greatly lower noise levels, however, they might not entirely stop all sounds. Their efficiency varies depending on the type of noise you’re trying to limit, the panel’s quality, and the size of the room.
q2. Can acoustic panels be painted to match my room decor?
Ans. Yes, a lot of acoustic panels can be painted to match the style of your room. To ensure the best sound absorption, however, it is crucial to utilize paint made specifically for acoustic panels.
q3. Can I install acoustic panels myself, or should I hire a professional?
Ans. With the right instructions, installing acoustic panels can be a do-it-yourself project. However, it’s essential to get professional advice if you have questions regarding the procedure or have complicated installation requirements.
q4. Are acoustic panels easy to remove if needed?
Ans. By releasing the mounting brackets or clips, the majority of acoustic panels are simple to remove. To find exact instructions, it is advised to consult the manufacturer’s instructions.
Tell Us In The Comments As Per You This Information Is Helpful
Additionally, don’t forget to read the other post on house making ideas, which will provide you with an insightful and helpful perspective.
